I have the DE10-Nano Kit from Terasic, which has a chip with FPGA fabric together with a dual-core ARM processor. You can run Linux from an SD card just like a mini computer system. I have been wanting to update the Linux kernel (version 4.14) and the FPGA hardware design, which now uses outdated Altera design IP for the frame buffer.
Terasic offers example Linux set ups and hardware design files, but these have not been updated for a few years and use old Linux kernels and old Quartus projects. Graphical output is possible via the HDMI port, but Linux needs to use a frame buffer to store each video frame. The Altera Video Image Processing (VIP) Frame Reader for graphics output was last updated in 2014 and is now deprecated. Moreover, support for this hardware component was dropped from the Linux kernel at the start of 2020. The successor is the Intel Video and Image Processing (VIP) Frame Buffer II, but this IP requires a paid license without tether or time limits. I could not figure out the process of purchasing the IP, because all the web links led me in a circle with no offer of a web form or sales contact. In summary, it just seems like a dead end for my hobby purposes.
I decided to keep using the deprecated Altera Video Image Processing (VIP) Frame Reader, and to instead update to a more recent Linux kernel (version 5.15.30) with the hope that I could patch back the kernel module for the Altera VIP Frame Reader, called altvipfb. My first attempt was to simply revert the reversion. This did not work, and I got a stack trace during boot up when the altvipfb module was being loaded (altvipfb_probe).
My next attempt was to look at the source code of the altvipfb2 module (altvipfb2.h, altvipfb2.c, altvipfb2-plat.c), which is the successor to altvipfb, in the hope that the code would be similar enough to help give me clues as to how to modernise altvipfb's usage of the frame buffer API. Luckily, this was the case and I was able to reorder the initialisation sequence of the module and update a few API calls and have the altvipfb driver working! A summary of the changes can be found in my gist:
There have been some major software updates to macOS and benchmarking software, so I thought I'd update the benchmark results. As before, my MacBook Air has the combined wind channel + heat sink + heat pad modifications, and I ran the tests in Intel Power Gadget 3.6.0, Geekbench 5.3.1, and Cinebench R23. I used the same set up as before, but also waited for the CPU to cool down to around 40℃ before running the next benchmark. Each benchmark was executed at least three times and I report the average.
When I run the stress tests in Intel Power Gadget, it seems that the max sustained frequency is 100MHz lower than before, but the CPU temperature plateaus at about 80ºC. I guess Big Sur is throttling the CPU even more?
MacBook Air (early 2020) configuration: i7/16GB/1TB
Date of original mod: 3 June 2020
MacRumors: Post 1,675
I did my final mod by replacing the homemade tinfoil thermal pad with an EC360 GOLD (thermal conductance of 14.5W/mK). Other modders on MacRumors seem to have been able to get good (better?) performance with thermal pads of lower conductance. The thickness is 1.5mm -- it is thicker than necessary for the area near the edge of the case, but a good fit closer to the battery.
The thermal pad wasn't long enough so I used the off-cut to cover the right edge. I peeled the blue protective sheet prior to putting the back cover back on. For fun, I created a heat spreader from a disposable tin tray that sits between the fan and on top of the thermal pad. I coloured it black for some extra black-body radiation. I have no idea how helpful or detrimental it is!
MacBook Air (early 2020) configuration: i7/16GB/1TB
TL;DR: The combined modification of the wind channel, heat sink, and heat pad is reaching Apple's/Intel's hardcoded performance limits. Thermal dissipation of combined CPU and GPU load is still restricted.
Date of original mod: 17 May 2020
MacRumors: Post 1,254
Heat Pad Modification
The "corrugated" heat sink design for the MacBook Air quad-core processors allows air to go through the heat sink. The foam pad that is stuck to the bottom case seems to be there to stop air from going over the heat sink; unless it's simply there to prevent the bottom case from getting too hot. The heat pad modification is three-fold: completely seal off the space above the heat sink, increase the thermal mass of the heat sink, and improve the thermal conductivity from the heat sink to the bottom case.
I've always tried to go for low-cost reversible mods, and this one is no different. I took some tin foil and folded it multiple times to get something that was about 1 mm thick and roughly in the shape of the heat sink. I protected the edges with some clear tape and placed it on top of the heat sink.
Results
To evaluate the success of the combined wind channel + heat sink + heat pad modifications, I ran the tests in Intel Power Gadget 3.7.0, Geekbench 5.1.0, Cinebench R20, and Unigine Heaven 4.0. I used the same set up as before, but also waited for the CPU to cool down to around 40℃ before running the next benchmark. Each benchmark was executed at least three times and I report the average.
Intel Power Gadget 3.7.0
For the CPU stress test, it stays on max turbo boost for a bit longer before dropping down. Temperatures also rise more slowly and take much longer to reach the 90℃ range. GPU temperatures are also cooler by a considerable amount. I'm quite happy with the thermal headroom. When both the CPU and GPU are stress tested together, there is about 10℃ of thermal headroom, but both seem to have been held back by some hardcoded limit.
After a 15 min stress test using Intel Power Gadget, the bottom of the case felt subjectively hotter, but the temperatures around the case were actually one or two degrees cooler than before (i.e., just the wind channel and heat sink mod).
Geekbench 5
Compared to the wind channel and heat sink mod, single-core performance was marginally worse (-1.7%), and multi-core performance was better (+7%). However, graphics performance was about twice as good, although this increase does seem too good to be true and could be a Geekbench glitch on the three consecutive runs (?). Click on a "Mod" result to view the best that I got.
Compared to the wind channel and heat sink mod, performance was better for single-core (+3.5%) and multi-core (+6%). I do find it funny that Cinebench is a CPU-only benchmark, so I didn't get the high performance boost from the Compute results of Geekbench 5.
Test Type
Original (Points)
Mod (Points)
Improvement
CPU (Single-core)
353
405
14.6%
CPU (Multi-core)
979
1,192
21.8%
MP Ratio
2.77
2.94
6.3%
Unigine Heaven 4.0
I used the default custom settings (medium quality). There was a slight improvement, probably because both the CPU and GPU are being loaded, so it's because of the hardcoded limit or both are competing for the same heat sink.
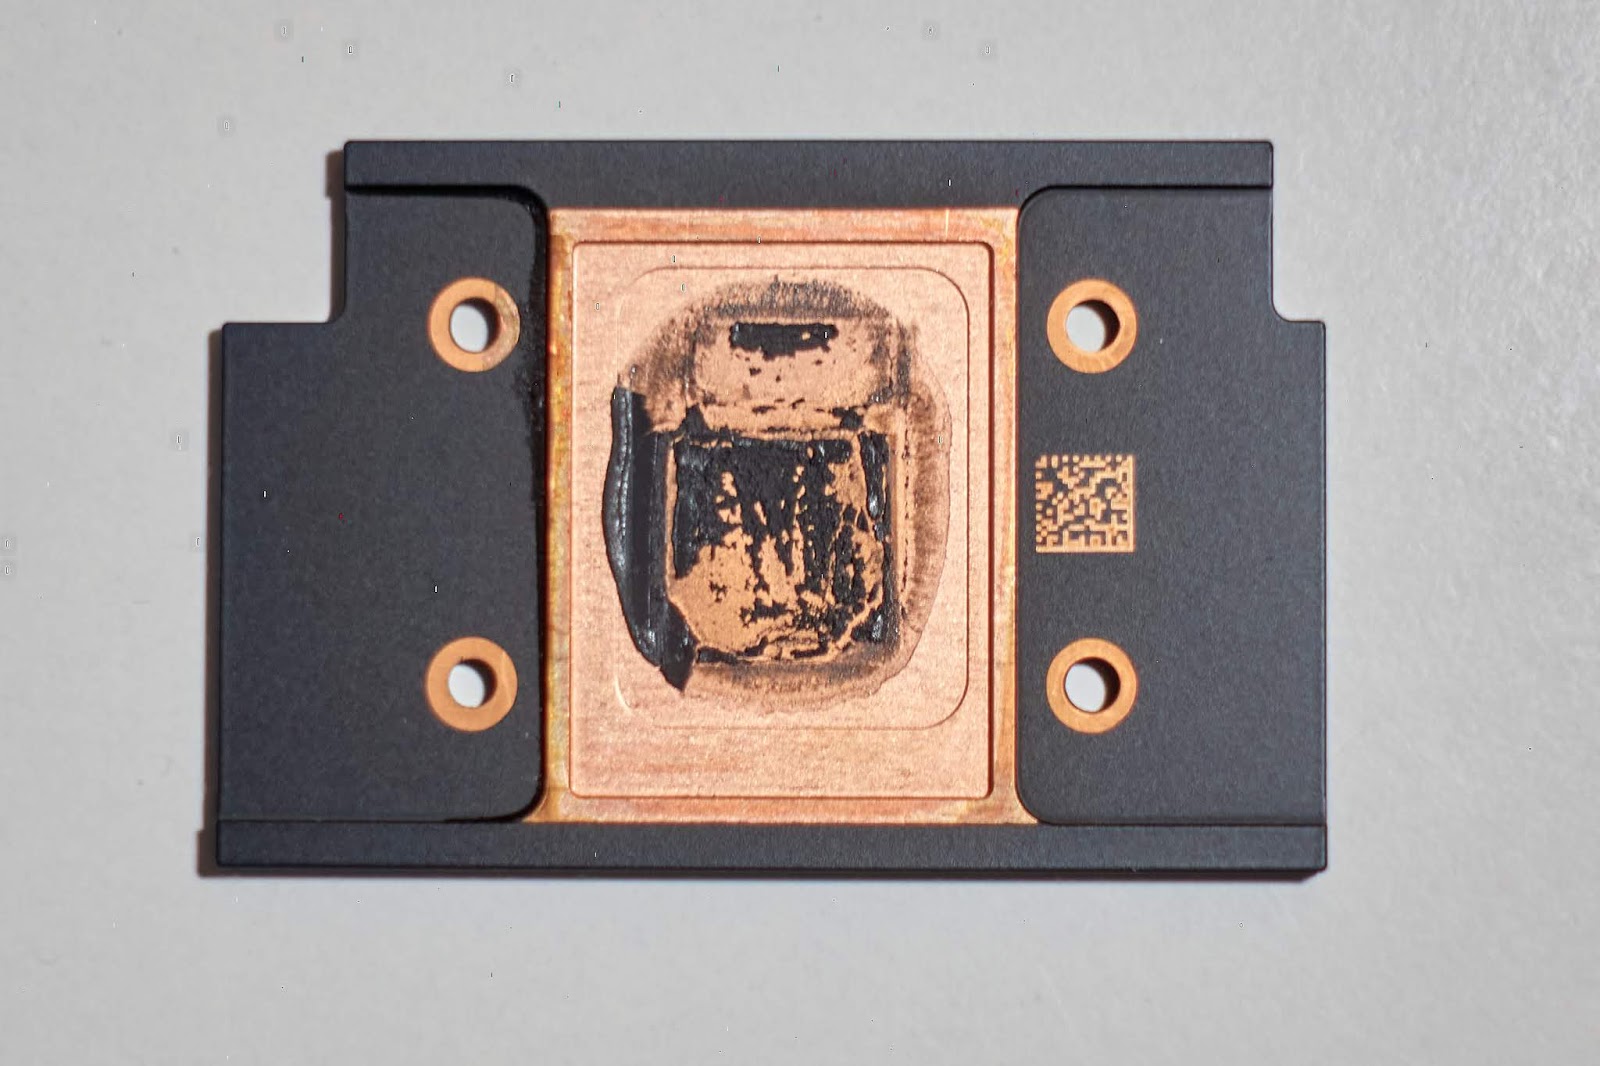
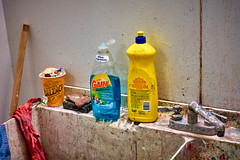
The photos below provide an overview of what we're dealing with. The heat sink is made of aluminium and the underside has a copper coating. A dark, thick, gritty thermal paste has been used.
Note: bottom case screws are Pentalobe 5 (P5) and heat sink screws are Torx 4 (T4).
After cleaning the thermal paste off the processor and heat sink with alcohol wipes, we can see more clearly a shallow cutout in the heat sink's underside, which contributes to the unnecessary gap between the processor and heat sink.
Below are rough measurements of the processor and heat sink, which will be useful for knowing how big of a copper shim to use.
The "2 cm" marking is aligned to the inner edge of the heatsink padding:
I should have aligned the "3 cm" marking to the inner edge of the heat sink padding:
The "2 cm" marking is aligned to the long edge of the cutout:
The "3 cm" marking is aligned to the short edge of the cutout:
The heat sink relative to a 15x15 mm copper shim:
Heat Sink Modification
To gauge how thick the shims needed to be, I prototyped some "shims" from paper of various thicknesses. I found that the thickness of a business card was quite good. Unfortunately, the shims I bought were 0.6 mm thick, so I had to spend a few hours slowly filing them down. In the end, they were still thicker than I needed, but at least thin enough for me to screw the heat sink down. The heat sink screws are incredibly small and the threaded ends are only around 2 mm in length.
I didn't have shims in the correct planar size, so I had to cut one of my 15x15 mm shims to get enough length. A width of 15 mm is enough to cover the CPU and GPU.
I spread a thin layer of Arctic MX-4 thermal paste onto the heat sink and "pasted" the shims on. This way, I know that the shims will be positioned properly when I lay the heat sink back onto the processor (with another layer of thermal paste).
Results
To evaluate the success of the combined wind channel and heat sink modifications, I ran the tests in Intel Power Gadget 3.7.0, Geekbench 5.1.0, and Cinebench R20. I used the same set up as before, but also waited for the CPU to cool down to around 42℃ before running the next benchmark. Each benchmark was executed at least three times and I report the average.
The first thing I noticed was that the CPU temperature was much less sensitive to changes in CPU load, which might mean that the fans switch between on/off less often. In the screenshots below, the temperature rises gradually, whereas before it would shoot up much steeper.
After a 15 min stress test using Intel Power Gadget, the temperatures around the case appear normal.
Geekbench 5
The single-core and graphics performance are only slightly better. I think it is because thermal throttling did not happen much for those tests with the original heat sink. Multi-core performance, however, is about 20% higher. Click on a "Mod" result to view the best that I got.
MacBook Air (early 2020) configuration: i7/16GB/1TB
TL;DR: Sealing up the wind channel appears to only offer limited performance improvements.
Date of original mod: 29 April 2020
MacRumors: Post 966
Background
Soon after the 2020 MacBook Air was released, it was soon discovered that the thermal design of the processor heat sink appeared to be suboptimal. In fact, this discovery was first made when srkirt, a MacRumors forum poster, took the heat sink off his 2019 MacBook Air processor and found that the heat sink does not directly on top of the processor. Instead, there is a sub-millimetre gap that is filled by a dark, thick, gritty thermal paste. This started a series of experiments in improving the thermal performance of the 2020 MacBook Air.
Below are some photos of the innards of the MacBook Air. The heat sink looks somewhat like corrugated cardboard but in metal form. The foam pad that is stuck to the inside of the bottom case seems to be there to press against the heat sink so that all the air is forced to go through the heat sink.
Note: bottom case screws are Pentalobe 5 (P5).
Wind Channel Modification
My first modification was to see if thermal performance could be improved by focussing the air to pass over the heat sink. By sealing the area between the fan and heat sink, the hope was that this will force the fan to draw all its air from behind the heat sink, thus maximising airflow through the heat sink for hopefully higher cooling effect.
For a lack of appropriate materials, I cut strips of corrugated cardboard and lined them against the metal separators that are next to the batteries (indicated by red boxes below). I found that performance was worse when the cardboard strips were taller than the metal separators, compared to them being the same height. I think this was because the cardboard would push bottom case out and create gaps in the wind channel. Corrugated cardboard turned out to be quite good because it has the thickness to hold itself in place and can easily be made narrower when needed.
Results
I used Intel Power Gadget (v3.7.0) to monitor the temperature and CPU/GPU frequencies, and used its built-in tests to load the CPU (All Thread Frequency) and GPU (Maximum Frequency). I let each test run until the frequency stabilised, and then maxed out the fans to test the full wind channel effect. I then let the frequency stabilise again (usually goes up). My MacBook Air was fully charged and plugged in, and the screen was set to maximum brightness and always on.
I ran the tests before and after the mod, and back-to-back to minimise differences in ambient temperature. What I saw was that the wind channel mod had a very slight effect on CPU (+70 MHz at best) and GPU (+30 MHz) performance. I forgot to take a screenshot of the original GPU performance. The temperatures around the case appear to be normal, so the wind channel modification doesn't seem to have an adverse effect on other components.
The question now is whether this slightly improved wind channel in combination with a heat sink modification translates to higher performance.
During the middle of May, near the end of spring, I visited Toronto, Canada for the first time. It was a last minute idea to go to Toronto because I had to take two weeks of annual leave and I didn't have much time to find other places to visit; was revising a journal paper in my "spare" time. I already heard nice things about Toronto and I liked that Canada uses a mix of English and French!
To prepare for the trip, I searched on Eventbrite for events or things to do in the Toronto region. I could then narrow down the exact dates of my trip based on the events I wanted to attend. I flew with Air Canada and the experience was fine; on par with Emirates, Swiss Air, or Air New Zealand.
Day One
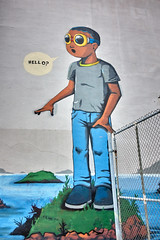
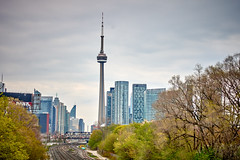
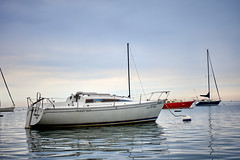
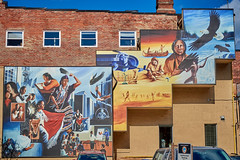
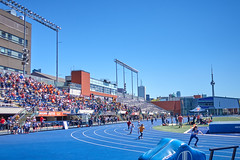
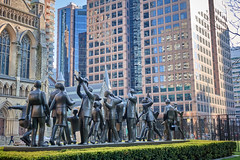
I arrived late in the afternoon to find that my German Vodafone prepay didn't support roaming in Canada. At the airport I got a Chatr prepay sim with 3gb "in-zone" data for $45 + tax. To make taking public transportation easier, I got the PRESTO contactless transportation card with some credit loaded up. You get a slight discount by using PRESTO instead of cash. I checked into my Airbnb after taking the Union Pearson Express train and a streetcar from the airport. I walked around town and noticed quite a lot of murals on the sides of buildings. I guess the city is quite relaxed with street art. On the bridge that goes over the train tracks on Strachan Ave, I found some decent views of the city. I walked through Coronation Park, towards the Lake Ontario, and found several moored boats. The lake looked surreal because it was quite calm and settled with a thin layer of cloud, knowing that it had rained quite heavily the week before. I ended up in the CBD and even walked past the filming of a police TV advert.
Day Two
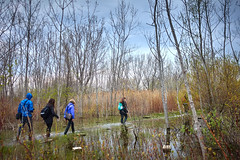
I woke up super early, with not too much jet lag, to attend the Tommy Thompson Park Spring Bird Festival. The park juts out into Lake Ontario and it used to be a dumping site for construction, so there are a lot of concrete rubble, bricks, and wires, but was reformed into a park that now attracts many types of birds. It was a Saturday so I wasn't sure how frequent public transport would be or how I to even get to the park. I ended up taking a street car to the eastern side of the CBD, but construction work meant that I had to get off early at Bay St. I ran down to Queen St and hoped that there would be a bus to Leslie St.
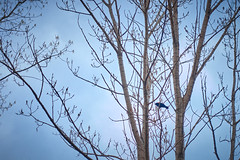
The guided bird tour was supposed to start at 8 am, but I was still walking down Leslie St. I pretty much gave up trying to make the guided tour, but luckily the guide was also late! They advised visitors to wear gumboots because Toronto had experienced some heavy rainfall the week before and that parts of the park are below the lake's water level. There were birding veterans and newbies on my tour, many with binoculars and some with cameras. I met a South African Torontonian who lent me her binoculars so that I could at least see some of the birds, which were quite small and in distant trees. Most of the time, I was not sure if I was looking at a bird or a large leaf on a branch. There was another person who pointed out some birds that were near me. Such friendly people!
The park is near Toronto Island, which has its own airport so we saw a few planes fly overhead. I caught someone looking in the direction of a plane with their binoculars and asked if they were looking at the plane as if it was a bird (cue corny laughter). Another chimed in by saying that the plane had a distinctive call sound.
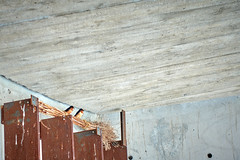
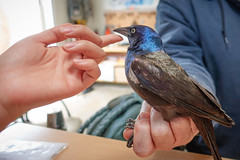
We visited the bird research centre, which was surrounded by a naturally formed moat due to the heavy rainfall. We, who didn't have gumboots or waterproof shoes, spent a while trying to find a way to cross the moat. Alas, there just weren't enough props sticking out the water for us to cross. Luckily, the research centre had volunteer boots which we could borrow! Inside the research centre, we could get a closer look at the birds being caught for quick health checkups and inspections in nets around the park.
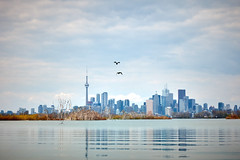
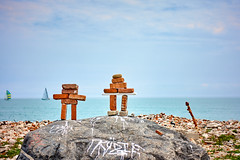
At the end of the park there is a small lighthouse surrounded by a lot of bricks. Some people have used the bricks to create freestanding sculptures. You also get a nice view of the harbour, the city skyline, and perhaps a yacht race or two.
I rounded the day off by walking through the neighbourhood back to the city centre. I like to walk when I'm not in a hurry, because then I can get a better feel for the city and its atmosphere.
Day Three (Happy Mother's Day)
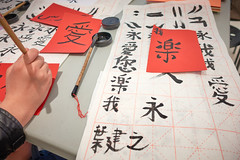
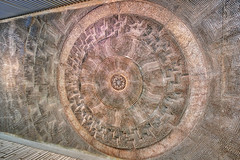
The Chinese calligraphy and tile painting workshops at the Gardiner Museum only started at 11 am, so I was able to sleep in and take my time getting there. Being born Chinese, it was a bit weird to be going to a workshop where you're expect to be an expert. My family immigrated to New Zealand when I was very young, so I never went through the Chinese education system. Although I use fountain pens daily, using a calligraphy brush was new to me. The pressure you put on the bristles determines the stroke thicknesses. At the workshop, there was one other attendee of Chinese descent. A cheerful lady took the workshop and demonstrated to the basic strokes used in Chinese characters. The brush is held vertically and between your thumb and forefingers. We were each given rice papers with practice grids to try out the strokes and some characters. I found it quite difficult to lay down a consistent line because the bristles would spread apart instead of staying in a tight bunch, and sometimes I would run out of ink. However, by the end of the workshop I had some control of my strokes.
At the tile painting workshop, we were given blank tiles and the theme was Imari, from Japan. It's characterised by the use of colourful paints and line bands. It was basically unsupervised painting with some example pictures for inspiration. I wasn't too sure of what to draw so I ended up painting a circular design with line patterns to fill the blank space. Afterwards, they sprayed the tiles with a clear varnish to seal in the paint.
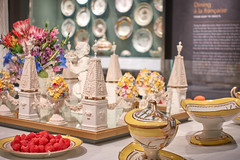
The Gardiner Museum itself had interesting exhibits of porcelain from around the world. A staff member slowly walked around and shared her thoughts on some of her favourite pieces. It was good because she drew my attention to special pieces, but it was kind of bad because I prefer not to be interrupted. Most interesting is the infatuation that Germans had with Chinese porcelain, where one army general traded hundreds of his men for a porcelain collection. The Europeans would also copy Chinese art designs on the porcelain. It's funny how nowadays it's the Chinese who appear to be the copiers. The staff member tried to guess my accent and when she found out it was New Zealand, she tried to say "pants" in an awkward New Zealand accent; she's Australian.
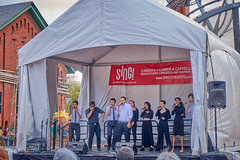
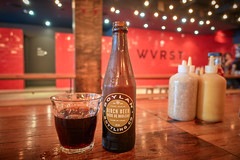
I walked over to the Distillery District, which was quite a sunny but windy place. It may have been the positioning of the buildings that led to a wind tunnel effect. There was a residence building for lots of creatives to work in and to exhibit their creations, similar to PMQ building in Hong Kong. I found a lot of creative shops and outlets. A singing event, called Sing!, was happening and it featured a cappella groups. During an intermission, I found a small bakery that sold some glorious (shepherd's) pies.
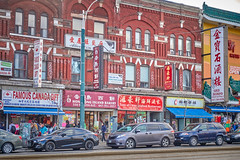
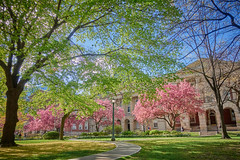
I rounded the day off by walking through Chinatown and checking out its authenticity. There were more than just Chinese businesses in that area; should be called Asiantown instead. On my way, I went past a few nice parks with cherry blossom trees and murals.
One of the things I noticed with the weather in Toronto was that the breeze can be quite cold. While walking along a street, I found that I was sweating in the sun and shivering in the shade of the buildings. I was never sure if I wanted to have my jacket on or off!
Day Four
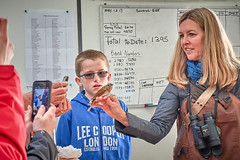
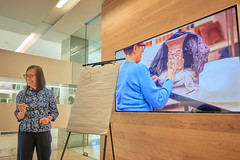
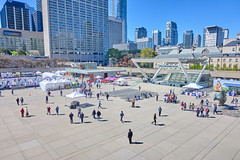
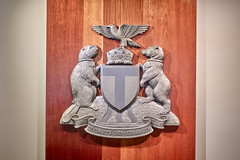
I had a slightly early morning with a 10 am event for the Newcomer Day City Hall Tours. At the Toronto City Hall, there was going to be an open air ceremony for Toronto's newest citizens. At my volunteer-led tour, we were taken inside the City Hall and given some information about the council's roles for, e.g., businesses, parks, community activities, and immigrants. I particularly liked the slogan on the City of Toronto's coat of arms (Diversity our Strength), which opposes the mentality of the neighbouring USA. Outside the City Hall, there were many stalls set up with different services to immigrants and communities. For the citizenship ceremony, they had performances by different ethnic groups, interleaved with speeches by council members.
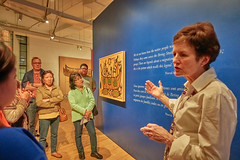
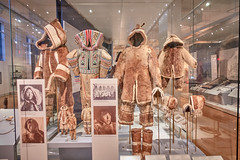
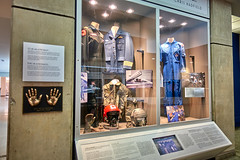
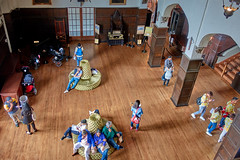
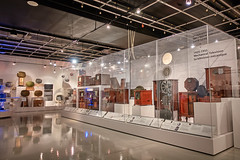
In the afternoon, on my way to the Royal Ontario Museum, I saw a relay competition taking place at a school. The museum is big and I only saw half the exhibits. Because I arrived at the museum quite late in the afternoon, I decided to join a short tour that highlighted a few exhibits. Judging by the style of the rooms and the display cases, you can tell when you are in the new extension of the museum or looking at a permanent exhibit. I focussed mostly on the aboriginal exhibits because they are unique to Canada, whereas the dinosaur and international galleries are quite common among museums all over the world.
Day Five
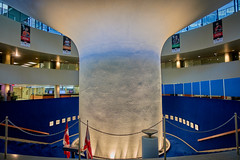
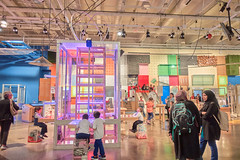
I went to the Ontario Science Museum, which was a bit out of town; I had to take the subway and a bus. The museum straddles one side of a hill, so it was naturally multi-levelled with escalators and stairs connecting the levels. The museum was quite big and sadly I could not see it all. They had many interactive exhibits, so many of the school children there were quite engaged. It is like the Exploratorium in San Francisco. They also had live science demonstrations and a small planetarium with shows on the Torontonian night sky. During the show, they highlighted a few constellations and zodiac signs, but to be honest I got confused about which directions were north or east. The museum had a very small tropical rainforest in a courtyard, and some insect and snake enclosures. Apparently, there are no naturally occurring venomous snakes in Toronto. I quite liked the cloud chamber for visualising the spontaneity of radioactive decay.
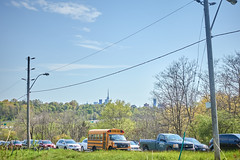
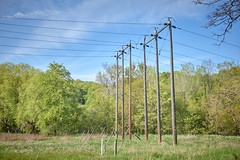
After the museum, I decided to take a hike through Don Valley. Unbeknownst to me, there weren't many exit paths I could take to leave the trail for the residential area. I ended up walking ~1.5 hours along the trail, which I didn't mind, but I was meeting a friend in the CBD for dinner before going up the unmistakable CN Tower. There were some nice scenes with the Don river and bridges, and I saw my first warning sign for poison ivy. A lot of the trail is shaded by trees so there were some cool breezes, with some clearing here and there for more open scenery.
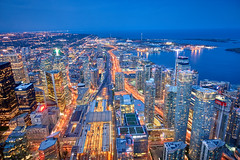
After a filling dinner at Bun Saigon Vietnamese Restaurant, we got to the CN Tower during sunset so there wasn't much "golden hour" left. It was quite a nice day with some scattered clouds taking on the orange glow of the setting sun. The CN Tower had an information wall that was quite outdated (maybe more than a decade old)! Taking night shots of Toronto was a bit hard because I didn't have a tripod and I needed to avoid reflections from the windows. Below the observation deck, it was possible to step out and walk around the tower. It was heavily fenced with red mesh so you can't be blown or pushed off into the city below.
Day Six
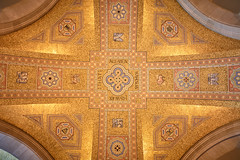
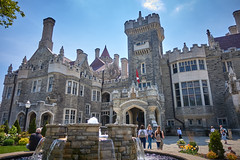
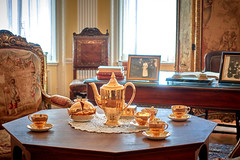
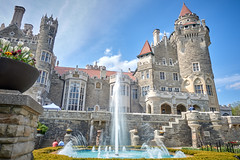
Started the day off by going to the Casa Loma castle, built in 1911 by Sir Henry Pellatt who was a businessman and part of the Queen's Own Rifles regiment in Canada. Because of the world war and subsequent downturn in the economy, Pellatt could only afford to keep the castle running until 1923. Nowadays, the castle is well kept and in good condition. It has three main floors with many rooms, passageways, and towers. Nearly every bedroom has its own fireplace and nicely decorated with sofas and chairs. The floors are covered in nice wooden panels, running in parallel or in a V-wave pattern. For its time, the castle was fitted with fairly advanced electrical systems, telephones, elevator, bathroom showers, and toilets. In a detached building connected by an underground passageway, there was a horse stable, garage, and greenhouse.
Going up one of the two towers of the castle, you can get a good view over the surrounding area, helped by the hill that the castle sits on. The spiralling staircases that you need to walk up and down are very tight and narrow, so be sure to avoid meeting people who are going in the opposite direction to you! The castle closes at 5 pm most days to prepare for private afternoon and evening functions.
One difficulty I had with the PRESTO card was with tracking my balance. The ticket validation machines on the busses and streetcars, and at the subway stations do not show you your remaining balance. Luckily, I was able to guess my remaining balance and to top up before running out of credit. Topping up with cash is a bit difficult. Top up machines are located in some of the subway stations, but they only accept credit cards. You can top up at participating stores, but you have to ask the checkout operator. I normally went to Shoppers Drug Mart, but they only recently added support for PRESTO because one of their checkout operators kept apologising for being slow with the top up process.
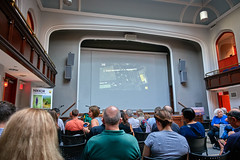
In the evening, I went to a Nikon Lecture Series on wildlife photography. I felt like an impostor with my Sony camera! The presenter, Tony Beck, talked about the places in Canada and the world for shooting different life and still photos of nature. Going from local to global, Tony went through examples such as your backyard, parks, recreational places, the outback, and then, for him, going overseas to Iceland, the Amazon, and the North and South Poles. With all the running around that I did during this holiday, I did feel a bit sleepy halfway through. The lecture would have been useful to those who like to hike and travel. Tony talked a bit about how he frames and composes pictures, although nothing too technical; more on being creative.
Day Seven
Had an early morning, starting with catching an 8:20 am VIA Rail train down to Niagara Falls. It was pretty much touch and go with only a few minutes to spare! I caught the subway from Ossington across to St George (green line) and then down to Union St (yellow line). Through Union St station, I had to walk to the VIA Rail platforms, which seemed to be under renovation. The train was fairly good, but I couldn't find any displays showing the current or approaching stop. They did have attendants walking through the train to announce the next stop and other bits of information. If you're a nervous traveller, then having a GPS map is a good idea. It wasn't the smoothest ride, but the seats are wide with lots of leg room. The train has two carriage zones; one for those stopping before the Canadian/American border, and another for those stopping after the border. The carriage for going to USA apparently gets "locked" before the train reaches the Niagara Falls station, and again I couldn't find obvious signage for which carriage I needed to be in.
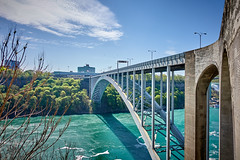
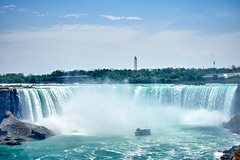
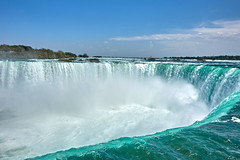
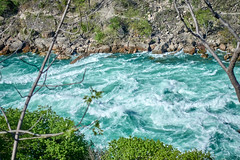
From the Niagara train station, you can walk to the falls by going south along Niagara River for about 20 min. You walk along the the gorge with the river flowing at the bottom, and you get a nice view of the rapids and falls in the distance. Alternatively, you can take a WEGO bus from the train station to the town centre. As you get within 100's of meters of the falls, the spray drifts up over the gorge and onto you. It also gets windier because the waterfall is continuously displacing the air around it. The spray and the wind combined together creates a noticeable wind chill, which can be quite refreshing under the hot sun. The river gets its distinctive green colour from dissolved minerals.
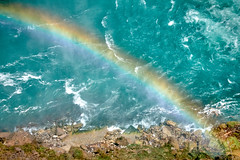
I got to the falls around noon so the sun was overhead, meaning that any opportunity to see a rainbow was limited to looking down at the river. It was still nice to see boats sailing underneath a rainbow. At the top of the falls, it is quite hard to comprehend its sheer size because there aren't any nearby objects for scale. The water travels quite fast as it goes over the vertical drop. The falls gets its distinctive horseshoe shape from the faster erosion at its centre than its sides.
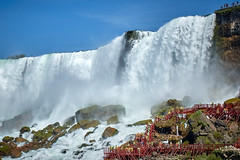
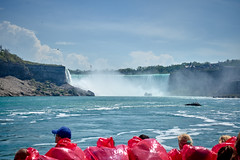
I went on the Hornblower ferry, which takes you up to the foot of the American and Niagara Falls. I'm pretty sure the boat crossed over the USA border without us going through immigration! I do think the Canadian boats look better than the USA ones. The wind and spray was super crazy at the foot of Niagara Falls and the wind chill was insanely cold, but refreshing! You do get given a red poncho before boarding the ferry, but it's nothing against the fine mist that instantly covers you in water. Make sure to keep your phones and cameras dry(ish)!
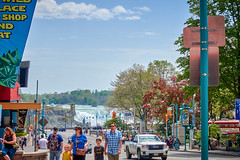
After seeing the falls, I went through the town to see what it had to offer. The touristic part is on a hill and it was like a mini Las Vegas. If you wander away from there, you get into the ordinary part of town, which seemed a little dead. You don't see many people and only a few shops. I went past a shop with a sign saying that they were still open and that they had not closed down!
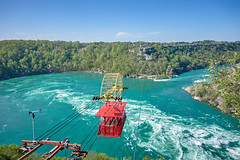
I went further down Niagara River to see the Niagara Whirlpool. It's a basin that redirects the water 90 degrees to the right, which is meant to create whirlpools. I saw tiny patches of gyrating water, but nothing resembling water draining from a sink. It was slightly disappointing for a nearly one hour walk and there weren't many people looking at it either.
Day Eight
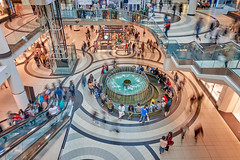
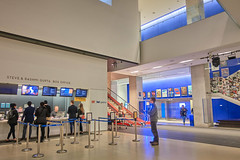
I had planned to visit Toronto Island, but the flooding of Lake Ontario meant that only residents were allowed to travel between the city and the island. Instead, I decided to go back to the Eaton Centre shopping mall to look for some clothes. I found Old Navy and was pleasantly surprised to find clothes that actually fit me. In Germany, everything is a bit too big for me. The clothes at Old Navy were quite cheap as well, so I picked up some shorts and t-shirts, especially a Blue Jays one. At Eaton Centre, you will also find an Apple store.
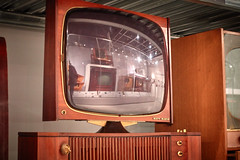
I then headed to the MZTV Museum of Television. It's actually an extensive private collection of televisions by Moses Znaimer, tucked away inside a room in The ZoomerPlex. I was greeted by a man who happened to be the narrator of their MZTV app; apparently I was the first to try out their app. The museum is nice but small, taking you through the invention of TV and how it has advanced from mechanical to electronic systems. I quite enjoyed the large range of TVs that were on display, and all in very good condition. You can take a self-guided tour with their app, which contains narrations and extra information.
After dinner, I went to the TIFF Bell Lightbox to watch a movie adaptation of the novel "1984" by George Orwell. I should have read up on story because I got a bit lost at the start when the protagonists and antagonists were being introduced. I'm quite bad with remembering names and characters, so sometimes I miss out on the parallel plot lines. I did appreciate the camera work, now that I'm trying to be an amateur videography with my awesome YouTube channel. The theatre was quite large, but only a few people were at the 9:30 pm screening, so it was nice to sit in peace and quiet and to enjoy the dialogues in front of me.
Day Nine
My visit to Toronto happened to coincide with the ISORC 2017 conference. This meant that my PhD supervisor was also in Toronto and we decided to meet in the morning to catch up and discuss how we would finish revising our heart modelling paper. We went for an early lunch at his favourite Thai restaurant, called Thai Basil, so that he could make it in time to catch his flight back to Auckland.
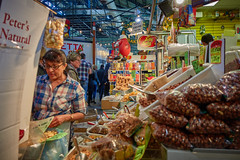
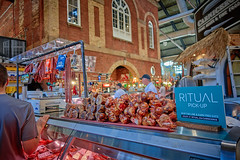
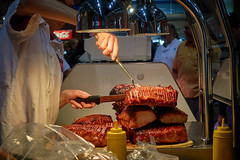
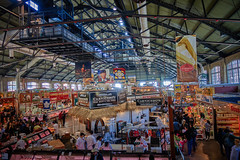
Before it was my turn to head back to the airport, I checked out the Farmer's market in St. Lawrence, a historic building. It was quite crowded with many stalls selling raw foods, ranging from vegetables, seafoods, to meats. There were also some stalls selling cooked meals. On the second level, in the Market Gallery, there is a small exhibition on the history of the building and on early immigrants.
Thoughts
I really enjoyed my trip to Toronto and I think it's because I purposely looked for interesting events to attend, which had some level of interaction in small groups. That made it easier to strike a conversation with random people. The guided bird tour of Tommy Thompson Park left me with a pleasant first impression of Toronto and it set my mood up for the rest of the trip.
To me, Toronto is like a much friendlier version of New Zealand. Coming from Germany, I had forgotten about the existence of small talk until I in Toronto at a supermarket checkout. People are quite helpful and also apologetic when they don't know the answer or don't have a solution. Torontonians also seem to have a sense of public responsibility. I saw a passerby pick up a shop sign from the pavement after it had been blown over by the wind. Last of all, Toronto really embraces its diversity!